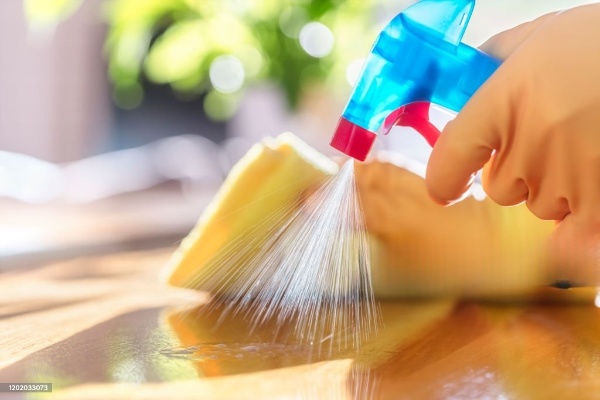
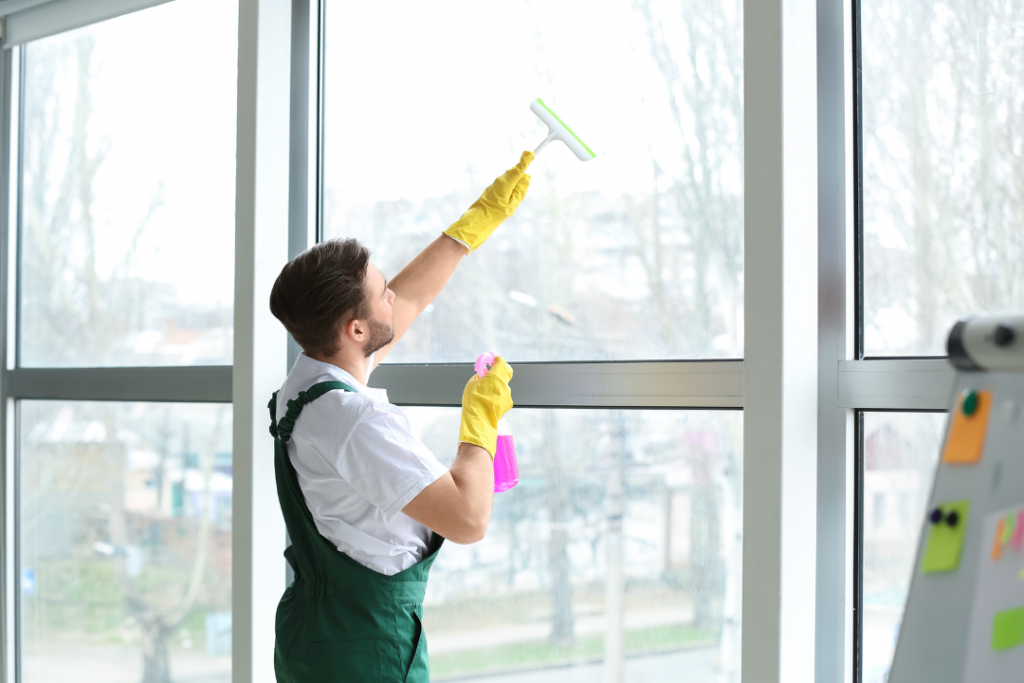
The Shine Trap: Why Hardwood Floors Get Sticky, Dull, or Cloudy
The trend for a while now has been to remove carpets and put in hardwood floors. Hardwood floors bring warmth, character, and elegance to any home without trapping a lot of dust and allergens that carpet can. But without the right care, they can quickly lose their luster and feel sticky or dull — especially if you’ve been using popular off-the-shelf cleaners. The culprit? Residue.
If you know anything about house cleaning in Ventura County, where dry air and foot traffic from both indoor and outdoor activity can drag in dust and grit, hardwood floors need more than just a quick mop. They need a smart, safe routine that protects your wood and keeps buildup at bay.
Common Cleaning Mistakes That Leave Residue
Many households unknowingly damage their floors with these habits:
Using too much water: Excess moisture seeps into cracks and can cause warping.
Choosing the wrong product: Cleaners with acrylic, wax, or polish can leave a cloudy film.
Skipping dry dusting: Mopping over dust grinds particles into the floor’s surface.
Not rinsing properly: Even natural DIY mixes (like vinegar) can leave residue if overused or not wiped away fully.
Residue doesn’t just dull the finish — it also attracts more dirt over time, creating a frustrating cycle.
Step-by-Step Guide: Cleaning Hardwood Floors the Safe Way
Step 1: Dry Dust First Always start with a microfiber dust mop or dry Swiffer to remove dirt, pet hair, and debris. Avoid brooms, which can push grit around and scratch floors.
Step 2: Choose a Residue-Free Cleaner Look for pH-neutral cleaners specifically labeled for hardwood. Avoid multi-surface products and anything with wax or oil unless you’re intentionally polishing.
Step 3: Use a Lightly Damped Mop Whether using a microfiber mop or flat mop, wring it out thoroughly. You want a slightly damp surface — never wet.
Step 4: Mop With the Grain Go with the wood grain for best results. Don’t over-saturate or leave puddles. Let the area air-dry or use a clean, dry microfiber cloth to speed up drying.
Step 5: Buff, If Desired Once dry, lightly buff the area with a dry microfiber cloth to restore shine.
Homemade Cleaners: What Works and What to Avoid
Safe DIY Mix:
1 part distilled white vinegar
10 parts warm water
Optional: 2–3 drops of mild dish soap
Spray onto a cloth or mop head (never directly onto the floor) and wipe gently.
Avoid:
Vinegar used daily or in high concentration — can damage finish
Baking soda — too abrasive for hardwood
Essential oils — can leave slick or sticky surfaces
Protecting Hardwood Floors in Simi Valley Homes
Dust and dryness are two major concerns for Simi Valley residents. To protect your floors long-term:
Use doormats inside and outside all entrances
Remove shoes indoors
Place felt pads under furniture
Vacuum with a soft floor attachment weekly
Control humidity to prevent expansion/contraction
And finally, avoid dragging anything heavy across the floor — scratches can trap dust and cleaning residue, dulling the shine further.
Not Sure If You’re Using the Right Method? Let a Pro Help
If you’re unsure what type of finish is on your hardwood (polyurethane, waxed, or oiled), or you’re not seeing results from your current method, it might be time for a professional cleaning.
Marching Maids has professional house cleaner in Simi Valley that know how to safely clean hardwood floors without damaging them. Whether you need a one-time deep clean or recurring service, we’ll match you with a background-checked pro who’s reviewed after every job.
Final Thoughts
Hardwood floors should feel smooth underfoot and glow naturally in the light. Ditch the sticky film and bring back the shine by using the right method, products, and maintenance routine.
In today’s world, where maintaining a clean and sanitized home has become more important than ever, understanding how to effectively clean high-touch areas is crucial. These surfaces, often overlooked during routine cleaning, are potential hotspots for germs and bacteria, making them a significant concern for the health and safety of your household. Proper sanitization of these areas not only ensures a cleaner environment but also reduces the risk of spreading infections. This guide provides an in-depth look at how to identify and sanitize these critical areas in your home.
Understanding High-Touch Areas: What Are They and Why Do They Matter?
High-touch areas are surfaces or objects within your home that are frequently touched by multiple people throughout the day. These include doorknobs, light switches, remote controls, kitchen counters, and more. Because these areas are repeatedly handled, they can become breeding grounds for harmful germs, bacteria, and viruses. Every touch increases the risk of contamination, making these surfaces particularly vulnerable to harboring pathogens.
The importance of regularly sanitizing high-touch areas cannot be overstated. In today’s health-conscious world, where the spread of infections is a significant concern, understanding the role these areas play in transmitting germs is essential. Neglecting to sanitize these surfaces regularly can lead to an increased risk of illness within your household. By taking the time to properly clean and sanitize high-touch areas, you contribute to a healthier home environment, minimizing the chances of illness spreading among family members.
Photo by iStock
The Importance of Regularly Sanitizing High-Touch Areas
Sanitizing high-touch areas is more than just a routine cleaning task—it’s a crucial step in protecting your family’s health. Germs and viruses can linger on surfaces for extended periods, sometimes lasting hours or even days. This lingering presence creates a high potential for these pathogens to transfer from one person to another, leading to the spread of illnesses like the common cold, flu, and other infections.
For households with vulnerable individuals, such as children, elderly family members, or those with compromised immune systems, the importance of thorough sanitization is even greater. These groups are more susceptible to infections, making it essential to reduce their exposure to harmful germs. Regularly sanitizing high-touch areas creates an additional layer of protection, helping to safeguard the health of everyone in the home.
How to Identify High-Touch Areas in Your Home
Before you can effectively sanitize, it’s important to identify the high-touch areas in your home. While some surfaces are obvious, others might not be as apparent. Understanding where these hotspots are located allows you to focus your cleaning efforts more effectively. Common high-touch areas include:
Doorknobs and Handles: These are touched every time someone enters or exits a room, making them a prime spot for germ accumulation.
Light Switches: Used throughout the day, especially in high-traffic areas, light switches are often overlooked during regular cleaning.
Remote Controls: Frequently handled by multiple people, remote controls are a common source of germs but are often neglected during cleaning routines.
Kitchen Counters and Cabinet Handles: These are essential areas in food preparation and are often touched with hands that may not be clean, making hygiene crucial.
Faucet Handles: Touched every time someone washes their hands, faucet handles can easily harbor germs if not cleaned regularly.
Appliance Handles: Handles on refrigerators, microwaves, and ovens are often touched by multiple people, making them another high-touch area that requires attention.
Photo by iStock
Electronic Devices: Phones, tablets, and laptops are constantly in use and can easily become breeding grounds for germs.
By identifying these areas, you can prioritize them during your cleaning routine, ensuring that they are thoroughly sanitized to reduce the risk of germ transmission. If you’re looking for a maid service near me in Ventura to help with sanitizing, contact us today to ask about this type of customized cleaning.
Step-by-Step Guide to Sanitizing High-Touch Areas
Once you’ve identified the high-touch areas in your home, it’s time to sanitize them properly. Effective sanitization requires more than just a quick wipe-down; it involves specific steps to ensure that surfaces are thoroughly disinfected. Follow this detailed step-by-step guide for optimal results:
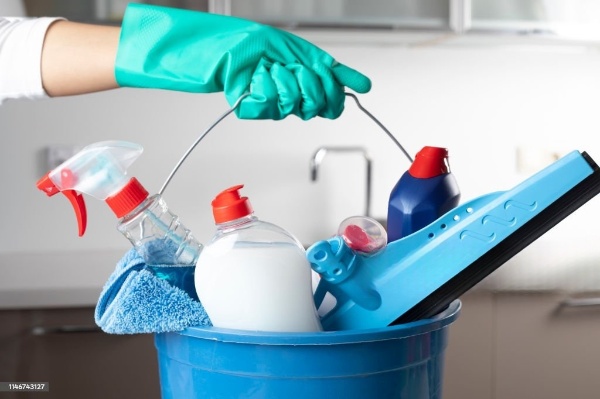
Gather the Right Cleaning Supplies
To sanitize effectively, you need the right tools and products. Start by gathering disinfectant spray or wipes that are EPA-approved, ensuring they are effective against germs and viruses. Microfiber cloths are ideal for cleaning, as they trap dust and dirt more effectively than regular cloths. Wear disposable gloves to protect your hands from harsh chemicals and to prevent the spread of germs. If you’re cleaning larger surfaces like floors or countertops, have a bucket and mop ready.
Photo by iStock
Pre-Clean the Surfaces
Before applying any disinfectant, it’s important to clean the surfaces first. Use a general-purpose cleaner to remove visible dirt, dust, and debris. This step is crucial because disinfectants work best on clean surfaces, where they can directly contact and kill germs without interference from dirt or grime.
Apply the Disinfectant Properly
Spray or wipe the disinfectant onto the surface, ensuring complete coverage. Follow the manufacturer’s instructions on how long the disinfectant needs to sit on the surface to be effective—this is known as the “dwell time.” Allowing the disinfectant to sit for the recommended time, usually between 3 to 10 minutes, ensures that it effectively kills the germs and viruses present on the surface.
Wipe Down the Surface
After the disinfectant has had enough time to work, use a clean, dry microfiber cloth to wipe the surface. This step removes any remaining product residue and ensures the surface is safe to touch. Microfiber cloths are particularly effective because they leave fewer streaks and pick up more debris than other cloths.
Don’t Forget Hard-to-Reach Areas
High-touch areas often include small or hard-to-reach spots, like the back of doorknobs or the sides of light switches. These areas can easily be missed during routine cleaning but are just as likely to harbor germs. Take extra care to clean these spots thoroughly, ensuring that all surfaces are sanitized.
How Often Should You Sanitize High-Touch Areas?
The frequency of sanitizing high-touch areas depends on the level of traffic and use within your home. As a general guideline:
Daily: For areas with high traffic, such as kitchen counters, doorknobs, and light switches, daily sanitization is recommended. These areas are touched frequently and are more likely to harbor germs, making daily cleaning necessary.
Weekly: Surfaces like remote controls, appliance handles, and less frequently touched items can be sanitized weekly. These areas still accumulate germs but not at the same rate as high-traffic areas.
During Illness: If someone in the household is sick, increase the frequency of sanitizing all high-touch areas to prevent the spread of germs. During illness, germs are more likely to be present on surfaces, making frequent cleaning essential to protect other household members.
Choosing the Right Disinfectant: What to Look For
Not all disinfectants are created equal, and choosing the right product is essential for effective sanitization. When selecting a disinfectant, consider the following factors:
EPA Approval: Ensure that the disinfectant is EPA-approved and proven to be effective against a wide range of viruses and bacteria. This certification guarantees that the product meets stringent safety and efficacy standards.
Contact Time: Check the label for the recommended contact time, which is the duration the disinfectant needs to remain on the surface to kill germs effectively. Following this guideline is crucial for ensuring the product’s effectiveness.
Safety: Consider the safety of the disinfectant, especially if you have children or pets in the home. Some products contain harsh chemicals that can be harmful if not used correctly, so it’s important to choose a product that is both effective and safe for your household.
Ease of Use: Disinfectant wipes are convenient for quick clean-ups and smaller surfaces, while sprays are better suited for larger surfaces. Choose the format that best fits your cleaning routine and needs.
Natural Alternatives to Chemical Disinfectants
For those who prefer to use natural cleaning solutions, there are several options available. While these alternatives may not be as potent as chemical disinfectants, they can still reduce germs on surfaces:
Vinegar and Water: A 1:1 mixture of vinegar and water can be used to clean and deodorize surfaces. However, it is important to note that vinegar is not a disinfectant and should be followed up with an EPA-approved disinfecting agent for thorough sanitization.
Hydrogen Peroxide: This is a natural disinfectant that can be used on hard surfaces. It’s effective against a variety of pathogens when left on the surface for at least one minute before wiping it off.
Essential Oils: Some essential oils, like tea tree oil and eucalyptus, have antimicrobial properties. Adding a few drops to water can create a natural cleaning solution, although it should be noted that essential oils are not as effective as chemical disinfectants.
Additional Tips for Keeping Your Home Germ-Free
Beyond regularly sanitizing high-touch areas, there are additional steps you can take to maintain a clean and germ-free home:
Hand Hygiene: Encourage everyone in your household to wash their hands frequently, especially after touching high-touch areas. Proper handwashing is one of the most effective ways to prevent the spread of germs.
Laundry Routine: Wash household linens, such as towels and bedding, regularly in hot water to kill germs. Regular laundering of these items helps to reduce the overall germ load in your home.
Ventilation: Keep your home well-ventilated by opening windows or using exhaust fans. Good ventilation helps to reduce the concentration of airborne germs and improves indoor air quality.
Conclusion
Sanitizing high-touch areas is a simple yet effective way to protect your household from germs and viruses. By following the tips and guidelines provided in this guide, you can ensure that your home remains a safe and healthy environment for everyone. Regular cleaning and proper sanitization not only contribute to a cleaner home but also provide peace of mind, knowing that you are taking proactive steps to protect your loved ones.
FAQs
How often should high-touch areas be sanitized?
High-touch areas should be sanitized daily in high-traffic areas and weekly in less frequently used spaces. During illness, increase sanitization to prevent the spread of germs.
What are some common high-touch areas in a home?
Common high-touch areas include doorknobs, light switches, remote controls, kitchen counters, faucet handles, and electronic devices like phones and laptops.
Can natural disinfectants be as effective as chemical ones?
While natural disinfectants like vinegar and hydrogen peroxide can reduce germs, they may not be as effective as chemical disinfectants. It’s important to follow up with an EPA-approved disinfectant for thorough sanitization.
What is the difference between cleaning and sanitizing?
Cleaning removes dirt and debris from surfaces, while sanitizing involves using a disinfectant to kill germs and viruses on those surfaces.
Is it necessary to wear gloves when sanitizing high-touch areas?
Wearing gloves is recommended when sanitizing to protect your hands from harsh chemicals and prevent the spread of germs.
You Deserve to Live in a Sanitary Germ-Free Space
Marching Maids expert professional house cleaning service near me will be sure to not only leave your home spotless, but sanitized as well. Schedule your free Ventura house cleaning estimate today (888-571-9181)
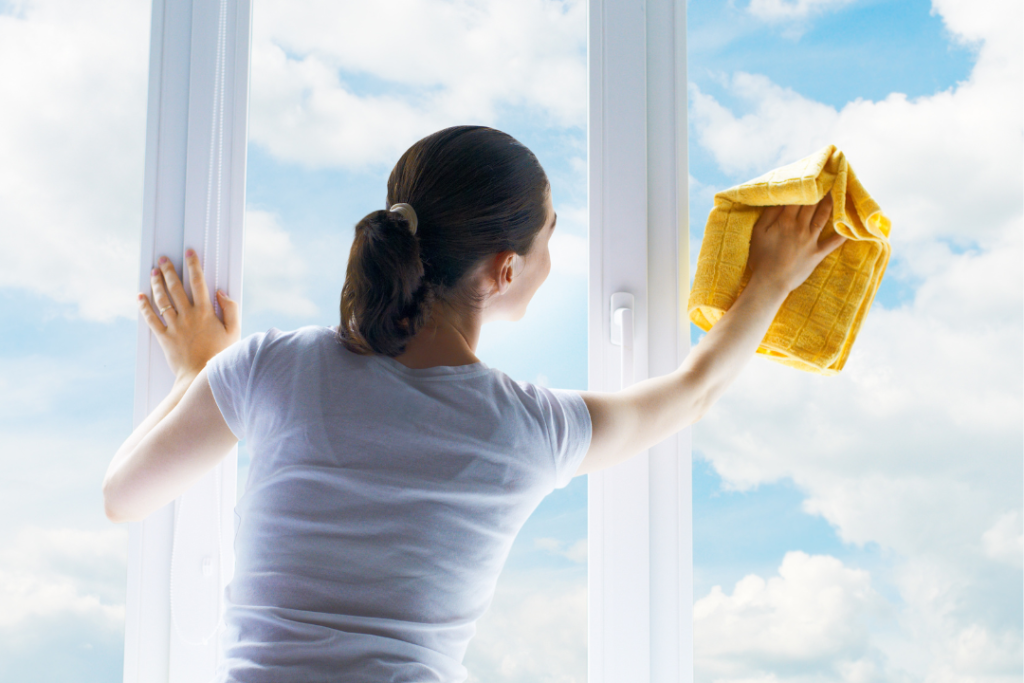
Keeping your windows clean isn’t just about maintaining a sparkling appearance; it’s about preserving the longevity of your windows and ensuring a clear view of the outside world. Clean windows can brighten up your home, allowing more natural light to filter in, and they can enhance your property’s curb appeal. However, one of the most common questions homeowners have is: How often should you clean your windows? The answer isn’t one-size-fits-all, as it depends on various factors that we’ll explore in this article.
How Often Should You Clean Your Windows?
In general, residential windows should be cleaned at least twice a year. This biannual schedule is sufficient for most homes, especially in environments where weather conditions are moderate, and there’s not a significant amount of dust, pollution, or other external factors that could dirty the windows. However, this is just a starting point. The actual frequency may vary based on several factors unique to your home and its surroundings.
Factors That Influence Window Cleaning Frequency
Climate and Weather Conditions
Weather plays a significant role in how often you should clean your windows. In regions with heavy rainfall, snow, or high humidity, windows are more likely to collect dirt and grime quickly. Wind can also blow dust, pollen, and debris onto your windows, necessitating more frequent cleaning.
Location of Your Home
If your home is near a busy road, airport, or industrial area, your windows are more likely to accumulate dirt and pollution. Coastal homes may deal with salt spray and high humidity, which can lead to faster buildup on the windows. Homes surrounded by farmland may experience dust from plowing and harvesting, requiring more regular cleaning.
Type of Windows and Glass
The type of windows and glass you have can also influence cleaning frequency. For instance, tinted windows may show smudges and streaks more easily, requiring more frequent attention. Energy-efficient windows with special coatings might also need regular cleaning to maintain their performance.
Presence of Trees and Landscaping
Trees close to your home can shed leaves, sap, pollen, and even insect residue onto your windows. Bushes and plants near windows can also contribute to dirt and moisture buildup. If your landscaping contributes to dirty windows, you might need to clean them more often.
Air Quality and Pollution
If you live in an area with poor air quality or high pollution levels, your windows will likely need more frequent cleaning. Dust, smog, and other airborne particles can quickly settle on glass surfaces, making them look dirty and reducing their clarity.
Seasonal Window Cleaning Considerations
Spring Cleaning
Spring is an ideal time for window cleaning as it removes the grime accumulated over the winter months. The mild weather makes it easier to clean both the inside and outside of your windows. It’s also a great time to inspect your windows for any damage caused by winter weather.
Summer Maintenance
Summer brings higher temperatures and more sunlight, which can cause streaks if windows aren’t cleaned properly. Regular maintenance during the summer helps ensure that your windows are clear and free from dust, especially if you’re hosting gatherings or enjoying more outdoor activities.
Fall Preparation
Before winter sets in, fall is a good time to give your windows a thorough cleaning. This helps prepare them for the months ahead when they might not be cleaned as frequently due to cold weather. Cleaning in the fall also removes any debris or dirt that could cause damage during the winter.
Winter Challenges
Winter can be a challenging time for window cleaning, especially in colder climates where snow and ice are common. While it’s not always practical to clean windows during the winter, it’s important to keep an eye on them and clean off any heavy dirt or grime that could cause long-term damage.
Special Situations Requiring More Frequent Cleaning
After a Storm or Natural Disaster
Storms can leave behind dirt, debris, and water spots on your windows. It’s essential to clean your windows as soon as possible after a storm to prevent any damage from the accumulated debris.
Construction and Renovation Work
If you’re undergoing construction or renovation work, your windows may get dusty and dirty much faster. Construction dust and materials can cling to windows, making them look grimy. In such cases, you may need to clean your windows more frequently until the work is completed.
High Traffic Areas
Windows in high-traffic areas, such as near patios or doorways, may require more frequent cleaning. These windows tend to get smudged and dirty from fingerprints, pet paws, and general use.
The Benefits of Regular Window Cleaning
Improved Curb Appeal
Clean windows instantly boost your home’s curb appeal, making it look well-maintained and inviting. Whether you’re planning to sell your home or just want to enjoy its appearance, regular window cleaning is a must.
Better Natural Light
Dirty windows can block natural light from entering your home, making your space feel darker and less welcoming. Regular cleaning ensures that your windows allow in as much light as possible, brightening your home.
Prolonging the Life of Your Windows
Dirt, debris, and other contaminants can damage your windows over time. Regular cleaning helps to remove these harmful elements, extending the life of your windows and saving you money on repairs or replacements.
DIY vs. Professional Window Cleaning
When to Choose DIY Cleaning
DIY window cleaning can be a cost-effective option, especially for routine maintenance. If you have the right tools and products, you can achieve good results on your own. DIY is suitable for easily accessible windows and for those who enjoy taking on home improvement tasks.
When to Hire Professionals
Professional window cleaning is recommended for hard-to-reach windows, large homes, or when your windows require a deep clean. We have the experience, tools, and techniques to get your windows spotless without the risk of injury or damage.
Tips for Efficient Window Cleaning
Best Tools and Products
Using the right tools and products is key to achieving clean, streak-free windows. Microfiber cloths, squeegees, and a good quality glass cleaner are essential. Avoid using harsh chemicals that can damage the glass or surrounding surfaces.
Techniques for Streak-Free Results
To avoid streaks, clean your windows on a cloudy day or when the windows are in the shade. Start by cleaning the frame and sill, then move to the glass. Use a squeegee in a vertical or horizontal motion, and wipe the blade after each pass to prevent streaks.
Safety Precautions
Safety should always be a priority when cleaning windows, especially if you’re working on upper floors or using ladders. Make sure your ladder is stable, and never overreach. If you’re unsure about your safety, consider hiring a professional.
How to Set a Window Cleaning Schedule
Assessing Your Needs
Consider the factors we’ve discussed, such as climate, location, and special situations, to determine how often your windows need to be cleaned. Your schedule should be flexible, adjusting to changes in weather or other conditions.
Creating a Seasonal Cleaning Plan
A seasonal cleaning plan can help you stay on top of your window maintenance. Plan to clean your windows at least once in the spring and fall, with additional cleanings as needed based on your specific circumstances.
Conclusion
Regular window cleaning is essential for maintaining the appearance and functionality of your home. By understanding the factors that influence cleaning frequency and following expert tips, you can keep your windows sparkling clean year-round. Whether you choose to clean your windows yourself or hire professional window cleaning service near you in Thousand Oaks, a consistent cleaning schedule will ensure that your windows continue to enhance your home’s beauty and comfort.
FAQs
Can I clean windows with vinegar?
Yes, vinegar is an effective and natural cleaning solution for windows. Mix equal parts vinegar and water in a spray bottle and use it to clean your windows. However, avoid using vinegar on tinted windows or those with special coatings.
How do I clean hard-to-reach windows?
For hard-to-reach windows, use a squeegee with an extended handle or a telescopic pole. Alternatively, consider hiring a professional window cleaning service to handle these areas safely.
What should I avoid when cleaning windows?
Avoid using abrasive cleaners, scrubbing pads, or paper towels that can scratch the glass. Also, steer clear of cleaning windows in direct sunlight, as it can cause streaks.
How do I prevent streaks on my windows?
To prevent streaks, clean your windows on a cloudy day or when they’re in the shade. Use a squeegee with a consistent motion and wipe the blade after each pass.
Is it safe to clean windows in cold weather?
Cleaning windows in cold weather can be challenging due to freezing water and slippery conditions. If necessary, use warm water mixed with a small amount of rubbing alcohol to prevent freezing. For safety, consider postponing the cleaning until temperatures are milder.
Show Off Those Beautiful Windows and Make Your House POP!
Cleaning windows and leaving them streak-free is an art that takes sometime to craft. If you’re looking for professional results, get afree Thousand Oaks window cleaning estimate today and contact Marching Maids.
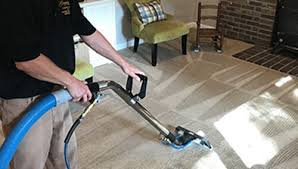
5 Reasons why you should clean your carpet regularly
The current trend is to put as much hard flooring throughout
the house as possible. It’s been the
case for a long time that one would put hard flooring in the kitchen since
there are so many spills and splatters to surely happen while cooking. The hard flooring then began to extend into
the dining room to make cleanups from the same spills so much easier than
carpet. Gradually it spread into the
living room because well, people started to eat and drink there as they lounged
on their recliners and sofas watching tv.
Who ever invented the TV dinner must be a least somewhat responsible for
doing such a thing? The bedrooms were
sort of the last room to be converted to hard flooring in some houses. A lot of homeowners that made the choice to
have no carpet in the home point to the fact that hard flooring is much easier
to clean and maintain by the homeowner, the number of allergens were reduced,
and the home appeared to look cleaner even if the wood floors had some dirt and
debris on them. However, there are still
lots of people that love having carpet in their house especially in the
bedrooms. And if you have ever walked
into a room with nice, fresh, soft, and clean carpet, you know exactly why. It
feels great under your feet, it doesn’t get cold like hard flooring does and it
makes the house just feel much warmer in general. Of course, there’s a cost to having carpet
and there are 5 good reasons why you should make sure its cleaned regularly.
1)Cleanliness.
Presentation is always important especially if you’re having guests over
regularly and you want to make a good impression. If someone walks into your home and sees a
beautifully decorated home but lots of stains and blemishes on the carpet, they
may have reason to believe your home is not very clean.
2)Odor reduction.
Unlike hard flooring, carpets hold a lot more odor and it can linger for
a long time. By professionally cleaning
the carpet you can eliminate most odors and get your home smelling good again.
3)Allergies. A lot of customers book a cleaning
because they have certain allergies that prevent them from cleaning themselves.
A major culprit is dust. Think about how
much settles on your carpet every day and digs deep into the fibers that normal
vacuum just cannot extract.
4)Preserve the life of the carpet. By regularly cleaning the carpet you ensure
that food and liquid spilled on the carpet does not turn into more harmful
bacteria and mold that’s difficult if not impossible to remove later down the
line. Such cases result in the homeowner having to remove the carpet completely
when they could have paid to just have the carpet cleaned if they acted sooner.
5)More livable and enjoyable. By having a clean and good smelling carpet,
people will be drawn to it. Whether
that’s your children sitting down on the carpet and playing with legos or a
family sitting on the carpet to enjoy a board game, you will not hesitate to
plop down.


 Book your Simi Valley house cleaning for not only hardwood flooring but your entire home.